Drawing planes involved in fire and rescue scenarios is not only an artistic endeavor but also a powerful means of communicating the valor and urgency inherent in such missions. This art form resonates emotionally with the general public, educates community residents, inspires firefighters and emergency personnel, and serves an important educational purpose for educators and school administrators alike. This article presents a structured approach to drawing these intense scenes, encompassing step-by-step guidance, artistic techniques for realistic depictions, and a wealth of resources to fuel your creativity. Through the outlined chapters, you will gain the skills and insights necessary to effectively capture the essence of air rescue operations in your artwork.
Raising the Sky: A Cohesive Journey Through Drawing Firefighting Planes in Rescue Missions
When we set pencil to paper to depict a firefighting plane in action, we step into a moment where speed, courage, and careful observation collide. The scene is not just a technical exercise in line and shade; it is a storytelling moment. The aircraft is more than metal and paint. It is a conduit for hope, a hovering figure that balances heat, wind, and restraint as it carries water, rope, or rescuers toward danger. To render this clearly and convincingly, you must blend precise anatomy with dynamic composition, so the viewer feels the urgency and the humanity of a rescue operation. This chapter invites you to travel from the blank page to a living, breathing airframe in flight, one that communicates purpose as readily as it communicates motion. You will learn to build from simple forms, respect perspective, and layer detail in a way that makes an audience lean in and read the air between rotors and flames as if it were a paragraph in a larger story about courage under pressure.
Begin with a mindset of study and intent. Gather your materials, not as a mere checklist but as the tools that will translate the life of a rescue mission into a two-dimensional surface. A pencil offers the freedom to sketch and revise; an eraser becomes a teacher that reveals how small changes alter the whole shape; a ruler helps you pace the geometry with the precision a real aircraft demands. Colored pencils, markers, or watercolors bring the heat of the scene to life. The palette is a language of urgency: reds and oranges for flames, dark grays and blacks for smoke, and bright accents for the rescue apparatus. If you wish to reference real-world design cues without relying on brand names, you can study generic firefighting aircraft from public references that emphasize the water tank, the external bucket, the skid landing gear, and the prominent rotor system. This approach keeps the depiction accurate while allowing your imagination to lend personality to the scene.
As you prepare to draw, hold in mind the core intention: the aircraft exists to intervene, to alter a dangerous moment into a chance for salvation. Let that purpose shape your decisions about proportion, line weight, and the balance of motion. The basic outline you will craft is a language first, with the details that follow acting as punctuation that clarifies who is in control of the moment and what is at stake. Picture the fuselage as a long, uninterrupted form that can flex with the wind, while the rotor above it becomes the pivot around which the entire scene orbits. If the painting could speak, the helicopter would be shouting a quiet message of readiness: this machine is here to help, and it is ready to do its job with precision, even as it seems to defy gravity for a heartbeat.
To begin, imagine the scene in simple terms. Start with a large circle for the main body of the aircraft, a fuselage that will read as sturdy and compact at a glance. From the front of that circle, draw two diagonal lines outward and upward to form the nose; they should slope gently to suggest an aerodynamic profile rather than a blunt bluntness. At the back, add two parallel diagonals that taper toward a point for the tail section, evoking the elongated, focused silhouette of a firefighting helicopter rather than a passenger craft. The landing gear can be represented by two bold, rounded “8” shapes resting on the ground line, hinting at the skid or wheel configuration without crowding the main form with excessive hardware. When you do this, resist the temptation to rush. The beauty of the simple shapes lies in how faithfully they read at a distance; a clean silhouette communicates competence and control—the very traits these missions demand.
With the foundation in place, the next move is to establish the key helicopter identity: the rotor system. On top of the fuselage, draw a short vertical line for the rotor mast. From that small mast, extend two long, slightly curved lines outward. These are the main rotor blades; they should taper toward the tips and catch a touch of perspective by arching slightly as they move away from the viewer. The rotor is more than a feature; it is the engine of motion in your composition. The sense of height, speed, and tension you achieve in your drawing will largely hinge on how you render the rotor’s length, the curvature of the blades, and the implied rotation produced by the blade tips. On the tail, place a small horizontal rectangle representing the tail rotor assembly, then add a short diagonal line to suggest motion. If you choose to render an air tanker rather than a helicopter, you will swap the rotor motif for wings and engine housings, but the same discipline of proportion—clear lines, readable shapes, and consistent perspective—applies. The idea is to capture a light touch of the machinery that can still convey mass and purpose from a distance.
As you escalate the scene’s realism, introduce necessary details that reveal its function. Cabin windows become windows to the action, small rectangular or oval shapes along the fuselage that imply crew presence and organization inside. The cabin door deserves attention as well; it is often a large opening near the middle of the aircraft, sometimes with a ladder or winch visible, signaling readiness for personnel deployment or water drop operations. One of the most distinctive features in many firefighting configurations is the water tank or external bucket hanging beneath the fuselage or attached to a long line. Depict this with a rounded oval or cylindrical form beneath the aircraft, using wavy lines to suggest water tension within the container or the motion of a rope and pulley system. Include the hose reel or an external bucket with a gentle sway of the line; these are the cues that communicate the machinery’s purpose without a single word.
To anchor the scene in realism while leaving room for artistic interpretation, add safety markings and identifiers. A bold stripe pattern along the fuselage, and a numerals like “119” in a place that reads clearly, evoke the emergency services identity without needing to speak aloud. You can use color cues that are traditionally associated with firefighting gear for recognition: a bright red primary body contrasted with white or yellow accents for visibility. The rotor blades can be rendered in gray or silver to suggest their metallic nature, while the rescue equipment—whether water tank, bucket, or rope system—can be highlighted in distinct hues to make it pop against the darker smoke or flames in the background. If you are drawing an environment where a fire is actively burning, let smoke drift across the scene in soft, billowy shapes. Smoke is a storytelling device as important as the aircraft itself; it frames the plane in context and suggests the scale of the emergency. The flame elements should glow with bright cores of orange and red, often with touches of white for intense heat. The contrast between the heat of the flames and the cool relief of the sky helps to dramatize the moment and gives your viewer a sense of peril and urgency without needing a caption to explain it.
Perspective is where many beginner attempts fall short. A convincing aerial rescue scene needs to show depth and spatial relationship. Think of the nose of the aircraft as pointing forward toward the viewer, while the tail recedes into the background. The rotors should appear as if they occupy space in the scene, with the blades crossing the air in a way that implies rotation rather than static stillness. Cast shadows underneath the fuselage and around the rotor hubs to ground the aircraft to the scene; a light source from above is a reliable choice and will guide your shading. This approach gives your drawing a three-dimensional feel and helps the viewer read the action from a single glance. The shading should be soft enough to preserve the crispness of the form while still conveying volume; use light gray tones to build up the mass of the aircraft, with darker shadows near the underside and near the rotor joints where light is occluded by the machine’s own geometry.
Color brings the story to life. The primary palette centers on red and white to reflect the classic firefighter color scheme, but do not neglect the other tones that convey weathering, material, and movement. A yellow or amber highlight on warning or signaling lights—perhaps perched on the roof or tail—adds life and realism to the scene. The background should evolve with the narrative: smoke in muted grays and teals, flames in blazing oranges and crimson cores, and a sky hinted with gradient blue or pale gray to reflect the time of day. In the air between the rotors and the ground, you can introduce a suggestion of wind through soft blue and white swirls that imply lift and airflow around the machine. A technique mentioned in recent educational discussions encourages these airflow accents as a dynamic, nonliteral way to communicate speed and momentum without overcomplicating the composition. If you choose to push the scene toward a more cinematic tone, tilt the aircraft slightly as if it is hovering in a moment of precise calibration, preparing to release water or send a crew to safety. The tilt suggests intentionality and control even within the apparent chaos of fire and smoke.
With the core geometry, mechanism, and atmosphere in place, you can begin to refine the storytelling elements that elevate a technical drawing into an emotionally resonant scene. Tiny figures inside the cabin can peek from windows, pilots with helmets and goggles focused on their tasks; those on the ground can stand with arms raised, signaling the arrival of aid. You might place a firefighter near the ground handling a rope or guiding a rescued civilian toward a safe path; such figures provide scale and inject humanity into the moment. If you feel the composition needs a sharper narrative thread, you can embed a small emblem on the aircraft’s side to hint at jurisdiction or unit identity, such as a symbolic crest or a municipal insignia. The key is restraint: every added element should reinforce the story without crowding the silhouette or distracting from the primary act of rescue.
As you approach finishing touches, ask yourself what the scene wants to say about the relationship between flight and safety. The aircraft is not merely a machine; it is a lifeline that enters a dangerous zone to alter outcomes. A well-drawn scene should whisper that message through the arrangement of shapes, the energy of the lines, and the balance of color. If your goal is educational, you can annotate the piece with a caption that reinforces the theme, such as a line about the critical role of air rescue in protecting communities from wildfires and industrial hazards. If your aim is more artistic, you can embrace a symbolic overlay—the sky’s gradient bleeding into the heat of the flames, a halo of light around the rotor from the emergency beacon—so the image becomes a meditation on courage, precision, and human resilience under extreme conditions.
Beyond the confines of the page, you can explore ways to expand this drawing into a broader visual campaign or classroom activity. For educators, a single firefighting aircraft scene can become a portal to discussion about safety, teamwork, and the layers of decision-making in disaster response. For students, turning the sketch into a poster can teach the interplay between art and public service, underscoring how visuals shape perception and empathy. A well-curated piece can serve as a bridge between technical illustration and narrative art, inviting viewers to linger on the moment when flight and fire intersect with the potential for saving lives. If you want a practical path to deepen your understanding of the mechanics while maintaining a strong narrative, study a range of reference materials that emphasize the equipment, the silhouette, and the way light plays across the surface of a firefighting aircraft. Look for resources that describe the rotor geometry, the water-carrying systems, and the rigid lines of safety equipment, but always translate those details into your own language of form and emotion.
As you weave these elements together, you might find yourself returning to one guiding principle: clarity. Clarity arises when the viewer can read the action immediately—the main rotor is turning, the aircraft is angled toward the target, a line or two suggests a water drop is imminent. Clarity is not a straightforward, literal translation; it is a disciplined economy of lines and tones that communicates the essential story at a glance. In practice, that means avoiding overly busy backgrounds that distract from the aircraft, keeping the proportions harmonious, and ensuring the flame and smoke read as legitimate hazards rather than mere decor. The most effective firefighting aircraft scenes strike a balance between technical fidelity and expressive momentum. They celebrate the ingenuity of rescue operations while honoring the seriousness of the moment. The result is a drawing that feels both credible and alive, capable of educating the viewer while also moving them on an emotional level.
If you are seeking a broader context for this drawing practice, consider using this work as a stepping-stone to explore broader topics in aerial rescue and public service art. A single image can become a gateway to conversations about how rescue organizations communicate through visuals, how training references translate into creative practice, and how artistically rendered scenes can support safety campaigns and community education. In this sense, your drawing is not an end in itself but a bridge—between observation and imagination, between professional practice and creative expression, and between the urgency of a fire and the calm competence of a rescue crew in action. As you cultivate your craft, remember to keep your practice iterative. Revisit your composition after a short break, compare your earlier version to your current one, and note how your understanding of space, motion, and emotion has deepened. Your future self will thank you for the revisions and refinements that transform a technical exercise into a compelling, truthful, and memorable image.
To connect the practical with the conceptual, you can view a range of instructional resources that demonstrate how air rescue scenes are built in real-time. For a broader look at how innovation and collaboration shape rescue work, you can explore Innovation Museum: Transforming Fire Services. This resource offers perspectives on how design and technology intersect with public safety, enriching your understanding of the context in which firefighting aircraft operate and how these innovations can be reflected in your art. You can visit this internal resource here: Innovation Museum: Transforming Fire Services.
Finally, if you want direct, practical reference material for step-by-step drawing that aligns with the ideas in this chapter, an external visual guide provides accessible instructions and diagrams that you can adapt to your own style. The guide walks through building the basic shapes, placing the rotor and tail rotor, adding equipment, and applying color and shading to simulate light and atmosphere in a firefighting aircraft scene. The beauty of such tutorials is not in copying but in understanding how the pieces fit together and then translating that understanding into your own expressive version of a rescue moment. For a comprehensive, kid-friendly, step-by-step approach to rendering a firefighting helicopter drawing, you can consult the resource linked here: https://www.drawingwithkids.com/firefighting-helicopter-drawing-tutorial. While this external guide is designed for a broad audience, the fundamental techniques—planning an outline, asymmetrical weight for dynamic balance, and layering color for impact—are directly applicable to the more advanced composition you are crafting in this chapter.
In sum, drawing a firefighting plane in a rescue scene is a practice in disciplined imagination. It requires you to anticipate the geometry of flight, to render the tools of rescue with fidelity, and to stage the moment so that viewers feel the weight of the danger and the relief of intervention. When you balance the crispness of the aircraft with the wildness of fire and smoke, when you let the rotor blades slice through the air with a sense of velocity, and when you place figures and equipment in a way that supports the narrative rather than cluttering it, you honor the true spirit of air rescue. Your chapter on this topic has become more than a technical tutorial; it has become a meditation on the interplay of craft, courage, and care that defines the work of those who fly to save lives.
Wings Over the Inferno: Masterful Techniques for Depicting Fire and Rescue Planes
A painter steps onto the threshold of a scene where speed, danger, and mercy collide. The aim is not merely to reproduce a machine in the air, but to invite the viewer into a moment when a plane becomes a lifeline, a beacon against the blaze. In these pages, we won’t chase a single flawless angle or a perfect photograph. Instead, we build a living image through choice, feeling, and craft. The act of drawing a fire and rescue plane begins with listening to the scene and then translating that listening into lines, colors, and rhythms. The plane is the primary actor, but the surrounding environment—smoke, heat, wind, a distant forest or a burning structure—provides the stage on which the drama unfolds. The goal is a cohesive, immersive moment that communicates urgency without sacrificing the logic of how aircraft look and move in real life.
Color and light set the emotional temperature of the image before any line is drawn. In a rescue scenario, flame colors burn with an almost incandescent intensity. Oranges flare, moving toward lemon yellows at the hottest points, then cool to ash-gray and blue-black toward the smoke. This temperature shift does not merely dress the flames; it informs the viewer about the direction and strength of the heat, the distance from the viewer, and the plane’s relation to the fire. The sky can be a pale, sunlit blue, but when a plume of smoke sweeps by, it darkens to charcoal or slate. The contrast becomes a narrative device: a hot, bright fire against a cool, calm backdrop. To paint this effectively, work in layers. Start with broad swathes of color to establish the general atmosphere. Then introduce the flame hues in deliberate, jagged strokes to mimic tongues of fire reflecting off metal. Finally, glaze the smoke with a cool blue-gray to push the heat back into the distance, letting the plane step forward as a crisp, trustworthy silhouette.
The plane itself must feel like a real machine with a life of its own. Its form is a combination of curves and angles: the rounded fuselage, the tapering wings, the blunt tail, the rotor or rotor blades in motion. Even without naming specific models, the artist should attend to the believable anatomy of firefighting aircraft. The body should suggest a sturdy build, smooth sections where metal catches light, and weathered panels where wear from wind, rain, and ash begins to show. Details matter not as flashy additions but as anchors to reality. The water-scooping or retardant-dispensing mechanism, the way the aircraft positions during a drop, the presence of a pilot’s cockpit with visible controls and glares on the canopy—all these features help the viewer infer the aircraft’s purpose and function. When used thoughtfully, these elements convey expertise without pulling the viewer out of the moment by offering up a catalog of parts.
Perspective is the quiet engine of drama. A plane can feel enormous when drawn to fill the frame, as in a composition where the viewer looks up from a low vantage point. This looming scale communicates immediacy: the aircraft seems to hover over the scene like a guardian and a threat at once. Conversely, pulling the plane back into a generous, aerial panorama can emphasize distance, danger, and the vast scale of a wildfire. For a rescue scenario, forced perspective—where the foreground is crowded with detail while the background recedes—heightens tension. You might place a helicopter hovering near a burning building or a drop aircraft skimming over a treetop canopy. The eye travels along the path of the aircraft, tracing its trajectory toward the fire as if following a lifeline thrown across a dangerous gap. In painting, this is achieved by using a slightly exaggerated foreshortening on the nearest wing, a brighter, more saturated highlight on the aircraft where it catches the sun, and a softening of details as elements recede into smoke and distance. Let the viewer feel the momentum of the approach, the crispness of the air just around the plane, and the electricity of the moment when the drop occurs.
In the realm of realism, the scene benefits from authentic details that audiences recognize from firefighting practice, even if the exact models vary. Visual cues such as the broad, flat surfaces of a water-bomber’s wings, the thick, robust fuselage, and the cylindrical tanks beneath or alongside the hull help the viewer identify the plane’s purpose at a glance. The texture of the airframe—polished metal catching a bright highlight, rivets catching the light in a grid pattern, subtle weathering along the leading edges—adds credibility. When rendering the action of a drop, the timing of the release matters. The retardant plume should not resemble a simple splash; it is a guided, directed flow that fans out in a cone as the plane tilts and maintains altitude or climbs briefly to gain lift before the next pass. The droplets themselves can be rendered as tiny, bright beads or as a mist that catches the sun, depending on the distance and the viewer’s focus. Observing how the water or foam clings to the aircraft’s underside, then dissipates into the air, helps illustrate the complexity of the operation without turning the image into a technical diagram.
Movement is not merely motion lines or blurred rotors. It is a choreography of forces: the rotor wash bending nearby smoke, the plane’s nose lifting or dipping as the pilot responds to wind shear, the trailing plume of exhaust billowing behind. To convey this energy, consider a few disciplined techniques. First, apply motion blur selectively on the propeller tips or rotor blades to indicate high speed while keeping the aircraft’s body sharp. Second, use soft, radial gradients of smoke and flame that appear to swirl with the wind, revealing the current direction and gusts. Third, punctuate the scene with a few spiky sparks or embers lifted by the air and carried outward from the fire—small details that deepen the sense of danger and scale without distracting from the main action. The viewer should feel the push of wind against the smoke and the pressure of the air around the plane as it executes a precise maneuver, delivering rescue teams or dropping water to contain the blaze.
Environment is the stage, but it also nourishes the drama. The air above the fire is rarely still; it carries heat, ash, and sound. Dramatic clouds can form on the horizon, their edges catching light from the flames and refracting it into a halo around the aircraft. The ground scene—trees scorched, a forest line blackened by smoke, a road snaking between emergency vehicles—adds context and tells a story of containment, risk, and urgency. The contrast between the sky’s cool tones and the ground’s smoky heat creates a visual tension that anchors the image. The smoke itself is a character, not merely a backdrop. It can curl around the plane, partial occlusions of the fuselage suggesting concealment or obstruction, while clear air on the opposite side frames the heroism of the crew. The viewer reads the arc of the plane’s flight as part of a deliberate strategy, a plan to reach, reach again, and reach once more toward the flame with confidence and precision.
When you aim for a narrative that resonates, allow symbolism to enter with restraint. A future-forward element—a drone designed for firefighting, an autonomous system that could, in theory, partner with traditional aircraft—can be introduced as a whisper, not a shout. This inclusion invites the viewer to imagine a broader context for rescue work, where technology augments human skill rather than replacing it. The visual language can nod to hope: a line leading from the plane toward a distant horizon where smoke thins, suggesting relief and a path toward recovery. Such imaginative touches do not erase realism; they deepen it by acknowledging the evolving nature of aerial firefighting and rescue efforts. This balance between fidelity and aspiration mirrors the arc of many rescue stories, where present danger meets the possibility of a safer future. For readers who want to explore this balance further, a broader discussion of innovations in fire services can be found in resources like Innovation Museum: Transforming Fire Services. Innovation Museum: Transforming Fire Services.
The process of translating these ideas into a painting is as important as the final image. Start with a loose sketch to establish composition, then tighten the forms that carry the most information: the plane, the water-retardant release point, and the fire’s leading edge. Layer color from general to specific: big blocks for the sky and smoke, mid-tones for the aircraft, and bright accents for the flames and highlights. Keep a dedicated study sheet nearby to track how color temperatures shift with distance and wind. A watercolor approach might begin with washes that capture the atmosphere; an acrylic or oil approach could build up layers, gradually revealing the metallic gleam of the aircraft and the luminous heat of the fire. Regardless of medium, the discipline is the same: make choices about what to reveal and what to imply. The eye reads a painting not as a catalog of details but as a living scene governed by light, space, and motion.
In integrating reference materials, look for credible visual cues that support your design choices. Reference images can illuminate the silhouette of a water-dropping aircraft, the curvature of its wing, or the way the spray pattern forms a cone as the plane climbs or banks. You don’t need to imitate a photo exactly—your aim is to capture the essential truth of the operation: control, precision, and courage. The value of reference lies in understanding how the form interacts with air and water under pressure, not in copying a single moment. If you encounter a detail that seems off, compare multiple angles and conditions. A slight mismatch in the wing’s angle or the shape of the canopy can disrupt the viewer’s trust in the scene. Correcting these small errors ensures that the image remains believable even as it conveys heightened drama.
To retain focus on the human element amid the machinery, weave the presence of people into the scene with care. Rescuers might appear as silhouettes or as small, defined figures approaching or being lowered from the aircraft. Their gear—the ropes, harnesses, and rescue baskets—should be rendered with enough clarity to be understood, yet not so literal that they overwhelm the composition. The rescue team acts as a moral axis, grounding the moment in human endeavor and sacrifice. The viewer should feel that lives are at stake and that acts of skill and bravery are taking place in real time. The emotional resonance comes from this balance: the machine’s awe-inspiring power and the crew’s resolute, quiet competence.
For artists seeking a more expansive approach, consider how the scene could unfold across a wider canvas. A single frame can suggest a broader sequence: the plane’s arrival, the positioning over the fire, the release, and the retreat as the fire’s immediate danger abates. This approach invites the viewer to fill in the gaps, engaging their imagination and sense of chronology. Even if you choose to isolate the moment of the drop, you can still evoke a larger arc by including subtle, preparatory cues—the pilot’s gesture toward a preplanned target, the coordination with ground crews visible as distant figures, or the glint of a safety beacon in the background. The sense of a larger operation—units working together, air and ground teams communicating across a shared mission—enriches the painting, turning a static image into a snapshot of ongoing heroism.
In practical terms, the drawing workflow that serves such scenes follows a steady rhythm. Begin with a rough composition, placing the aircraft and the most legible elements of the fire within the frame. Then plot the light sources: the sun, the flame glare, and the reflected light on the aircraft’s surface. This triad becomes the guide that anchors color choices and value relationships. After that, block in the plane with a tone that is slightly saturated to stand out against the background. Layer the flames with a hot blend of oranges and yellows, letting the color bleed into the smoke to establish continuity of heat. Finally, sculpt the smoke and weather patterns with cooler hues to create depth. The result should feel like the viewer is peering into a moment of truth, where training and courage meet the raw force of nature.
If you want to push the image toward a more symbolic or future-facing direction, you can introduce a quiet element of hope. A distant helicopter or drone in the sky, not immediately involved with the main drop, can symbolize ongoing vigilance and the ever-present possibility of improved rescue capabilities. The composition might also allow a break in the smoke where a streak of blue sky shows through—an invitation to believe that recovery is possible. By carefully calibrating the balance between realism and imagination, you craft a scene that is not only visually compelling but also emotionally credible. For readers who want a broader perspective on how such themes connect with evolving emergency-response concepts, you may explore broader discussions such as Innovation Museum: Transforming Fire Services, linked above. Innovation Museum: Transforming Fire Services.
The final painting should read as a coherent union of form, color, and narrative. The plane must feel tangible, the fire convincingly threatening, and the rescue effort clear in purpose. Lighting must unify the elements, so that even in the heat and smoke, the scene remains legible and legible in a way that honors both artistry and reality. When done with care, the image speaks not only to the spectacle of an air rescue but to the quiet bravery of the people who carry it out. It becomes a visual testament to a mission that is as technical as it is humane, where every calculated move by the aircraft and every deliberate gesture by the crew ripple outward, potentially altering a dangerous outcome. A viewer looking at such a painting should sense both the awe of flight and the gravity of saving lives, a duality that lies at the heart of depicting fire and rescue through the lens of aviation.
As you continue to refine your approach, remember that practice shapes perception as much as technique shapes painting. Revisit your studies with fresh eyes: compare your own iterations, analyze what holds the viewer’s attention, and consider how your color choices transform mood and meaning. Use constructive critique to guide your revisions, not to discourage your experimentation. The art of depicting planes in fire and rescue scenes rewards patience and perseverance, the patience to observe, the perseverance to render multiple passes, and the courage to transform fear and danger into something legible and humane on the page. Whether you paint from life, from staged references, or from the imagination, the key is to translate the force of wind, the heat of flame, and the precision of rescue into a visual language that speaks to the viewer across time. In this, the image becomes not only a representation of a moment but a conduit for shared understanding of what it takes to intervene, protect, and prevail when the sky lights up and the ground is at risk. If you want a deeper dive into related themes and want to see how other artists approach air-rescue subject matter, consider exploring further resources and examples that illuminate this terrain. For inspiration and context, see the reference work mentioned earlier on innovations in fire services. Innovation Museum: Transforming Fire Services.
External resource: https://www.shutterstock.com
Fuel for Creativity: Visual Inspiration and Practical Resources for Drawing Planes in Fire and Rescue Scenes

When you set out to draw planes in a fire and rescue scene, inspiration matters as much as technique. A strong visual idea—one that combines character, motion, and environment—gives every line purpose. This chapter gathers practical sources and creative entry points. It also translates them into a clear, lasting approach you can use whether you sketch with pencil or paint digitally. Read this as a single, continuous guide to where to look, what to study, and how to turn references into a compelling drawing.
Start by looking at the characters themselves. The animated film that inspired this theme offers stylized aircraft with exaggerated silhouettes, bold color schemes, and expressive faces. These traits help artists convey emotion and story while keeping planes readable at a glance. Study several stills to learn how proportions shift to show personality. Notice how the nose, cockpit shape, and wing angles change between a heavy fire-suppressant tanker and a nimble rescue chopper. Use those differences to build character into your drawings, even when you invent your own machines.
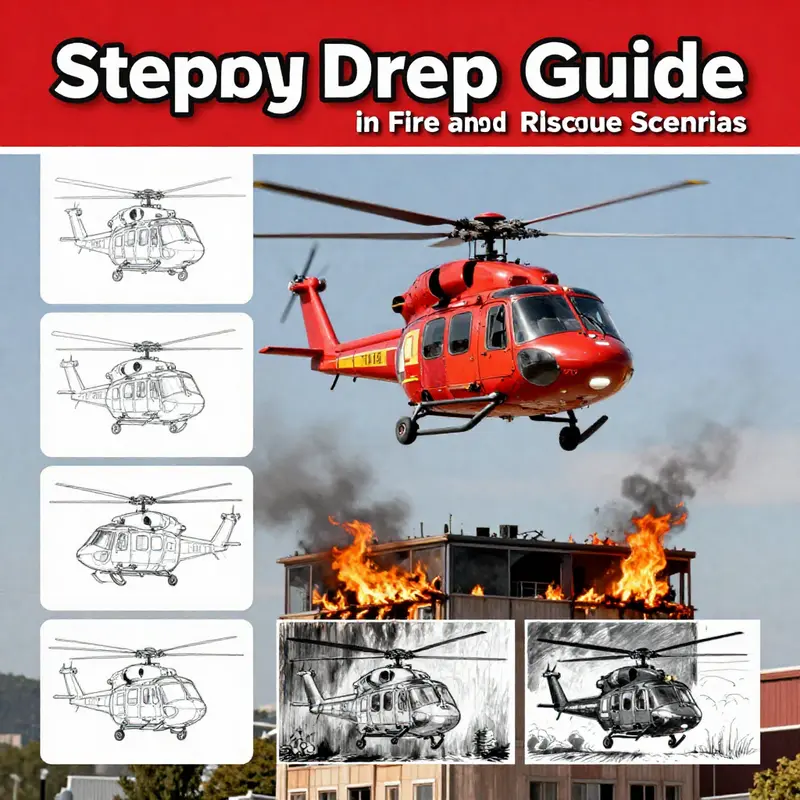
Beyond official imagery, community work is a treasure trove. Fan art communities show endless variations in style and approach. Browse concept sketches and finished pieces to see how other artists approach motion, smoke, and rescue rigging. Many artists share progressive images: thumbnail, rough sketch, refined lineart, and colored study. Watch how they build volume, simplify forms, and choose which details to keep. When you study variations, you learn which elements are essential to recognition and which are purely decorative.
Real-world reference deepens authenticity. Look at photos and technical drawings of firefighting aircraft and helicopters used in rescue operations. Study wing shapes, stabilizers, engine mounts, and hoist mechanisms. Note how cargo and water tanks are integrated. Real aircraft teach you where to place structural details so that your designs feel credible. Combining stylized characters with accurate technical cues creates a satisfying balance. Your plane reads as both believable and character-driven.
Composition matters as much as the subject. Fire and rescue scenes are inherently dramatic. Use that drama to create clear focal points. Arrange planes, flames, and rescuers so the viewer’s eye moves through the action. A plane in the foreground should have a strong silhouette against smoke or sky. A hovering helicopter with a rescue basket should have clear negative space around the hoist rope, so the viewer instantly understands the motion and the stakes.
Lighting and color define the mood. Flames offer a dynamic, high-contrast source of light. Study how orange and red fire tones interact with the cool blues of sky and metallic surfaces. The immediate glow of flames casts warm highlights and deep, colored shadows. Smoke behaves differently. It diffuses light and reduces contrast in mid-distance planes. Use saturated warm tones for foreground flames and muted desaturated tones for smoke and background elements. This contrast keeps your subject legible while making the fire feel intense.
Movement and timing turn a static drawing into a narrative moment. Think in terms of a single frame from a movie. Is the helicopter just beginning a descent, or has it paused, hovering mid-rescue? Is the plane dropping retardant in a wide arc, or has it just completed a pass and banked sharply? Capture a moment with decisive gesture. Gesture lines give planes motion; sweep a wingline differently to imply a steep bank. Use smoke trails and motion blur to enhance direction and speed.
Rendering fire and smoke convincingly is a specific skill. Fire is both transparent and reflective. Flames have a bright core, cooler outer edges, and tendrils that flicker unpredictably. Smoke often forms swirling volumes with varying opacity. When sketching, block in the biggest shapes first. Define the main flame masses and their core glow. Then add secondary details: embers, small offshoots, and smoke layers. In color, avoid flat orange. Use gradients from white-hot cores to saturated orange, then to deep red. Surrounding air will pick up reflected light. Paint or draw thin washes of warm color onto nearby surfaces to suggest heat.
A rescue scene needs human-scale cues. A small rescue basket, a tiny firefighter clinging to a harness, or a ground crew waving below give scale and urgency. Place these elements so they contrast with the aircraft. A helicopter lowering a rescuer into a burning building reads as more dramatic when the building towers over the figure. If you include emergency vehicles on the ground, simplify them to blocks of color and light. They should support the scene, not compete with the aircraft.
Collect and organize references methodically. Create a single visual folder or mood board for each drawing. Separate references into categories: aircraft design, fire behavior, smoke reference, human figures and rescue gear, and environment types like forest or urban structures. When you plan a composition, pick one image from each category as the primary guide. This prevents overload and fosters cohesion.
Practice translating references into thumbnails. Thumbnails are small, quick sketches that test composition and silhouette. Draw at least ten of them for a scene. Use bold shapes and strong diagonals. Decide where the plane sits in relation to the viewer. Is it foreshortened toward the camera, or seen from above? Thumbnails refine your idea before you commit to complex linework or color. Keep them loose and focus on storytelling.
Work on silhouette and readability. Silhouettes are your first layer of communication. A recognizable plane silhouette tells the viewer what to expect. If you design an original rescue aircraft, exaggerate one feature—an oversized tail, a distinctive rotor, or a layered wing—so your silhouette stands out. Against a smoky, chaotic background, a clean silhouette remains legible.
When you progress to structure, use simple geometric forms. Break a plane into cylinders, wedges, and boxes. This approach simplifies perspective. It helps you rotate the aircraft in space with confidence. A fuselage can be a tapered cylinder. Wings become thin wedges. Engines translate to cylinders clipped onto wing boxes. Keep joints visible so your machine looks assembled, not glued together.
Blend mechanical accuracy with expressive faces and markings. In animated styles, airplanes often have faces and anthropomorphic features. Integrate these smoothly. Place eyes within the cockpit and shape them to reflect mood. An intense, focused plane might have narrowed eyes and a forward-tilted brow. A veteran fire plane might carry minor paint chips and soot streaks. Small wear marks sell the story of repeated missions.
Explore different drawing tools to find what suits your scene. Traditional media offers texture and spontaneity. Pencil and ink are great for gesture and silhouette experiments. Watercolor or gouache can convey the unpredictable edges of flames. Digital tools provide control and quick iteration. Use layers to separate background shapes, midground smoke, aircraft, and foreground details. Layer blending modes help simulate glow and reflected light. Try soft brushes for smoke, textured brushes for embers, and hard-edge brushes for mechanical detail.
Pay attention to scale relationships. A plane dropping retardant creates a cloud-like plume. A helicopter hoisting a person has delicate ropes and a small basket. Scale anchors the drama. Measure relative sizes early in the sketch stage to avoid awkward proportions later. Use simple figure references to ensure humans remain believable in scale to vehicles and structures.
Narrative detail builds connection. A small flag on a tail, a logo, or a name painted along a fuselage gives personality. Scars, patched panels, and soot tracks tell a history. A rescue scene may include small human gestures—a firefighter leaning out a truck window, a waving hand from a rooftop. These elements are subtle but powerful. They invite the viewer to imagine a larger story.
Try a variety of color palettes before committing. Fire scenes can lean warm and dramatic, or cooler and more subdued, depending on intent. A sunset wildfire naturally mixes warm and cool tones. Night rescues allow you to play with strong contrasts: the warm glow of flames against a deep blue-black sky. Test limited palettes to see which reads best at a distance.
Reference motion design to enhance movement. Study how smoke curls and how fire spreads across different materials. A forest fire behaves differently than a house fire. Forest fires produce long smoke columns and rolling crown fires. Structural fires have more localized, turbulent smoke. Choose the reference that matches your scene and mimic the flow patterns you observe. These natural rules help your depiction feel real.
Use contrast to guide attention. High contrast near the focal plane and reduced contrast in the background create depth. Flames are a natural source of high contrast. Place the brightest values near the focal point. Shadows will be saturated with reflected color. Avoid gray, neutral shadows in the vicinity of strong flames; instead, deepen shadows with warm or cool color depending on your light source.
Plan for storytelling through sequence. Even a single image can suggest before and after. Implied motion lines, disturbed debris, and falling embers hint at movement outside the frame. This implied sequence keeps the viewer engaged. Consider drawing multiple panels or steps if you want to show the entire rescue rather than a single moment.
Look for teaching resources that break down scenes visually. Many online artists demonstrate step-by-step processes for aviation and rescue themes. Study tutorials that focus on gesture, lighting, and mechanical construction. These guides often share shortcuts for simplifying complex forms without losing realism. Use these lessons to inform your own shortcuts and to accelerate your practice.
Organize a reference checklist for each drawing. Include these items: clear plane reference, rescue rigging detail, fire and smoke behavior, human figure reference for scale, and a color swatch. Keep that checklist visible while you work. It keeps your piece grounded in observation and prevents last-minute inaccuracies.
Experiment with atmosphere and depth using layers. In painting, second and third layers of translucent smoke and ash add realism. Digital artists can use multiple overlay layers to simulate heat haze and glare. Traditional artists can use thin washes and glazing techniques for the same effect. Layering atmosphere properly separates planes from background chaos.
Don’t neglect gesture and emotion. Rescue scenes are high stakes. A plane’s posture, the tilt of its wings, and the curve of its nose can all convey urgency. A downward tilt and compacted profile suggest speed and dive. A level hover with a taut hoist rope suggests stillness and tension. Combine mechanical gesture with facial expression for anthropomorphized planes.
Finally, build a personal library of go-to assets. Save silhouettes you like, smoke studies, and hoist mechanics. Over time, this library becomes a toolbox that speeds up production and keeps your work consistent. You’ll also notice recurring visual motifs that resonate with viewers. Use them to develop a recognizable style without trapping yourself in repetition.
For a direct source of official film imagery and character stills, consult the film’s media page for accurate reference material: https://www.imdb.com/title/tt3568728/ .
For a thoughtful look at how public institutions reinterpret firefighting and rescue themes, see this internal exploration of institutional transformation: Innovation Museum: transforming fire services.
Use these strategies together. Reference, analyze, and then simplify. Let realism inform your decisions. Then, bend reality to emphasize story and expression. Over time, you will draw scenes that not only look convincing, but also feel alive.
Final thoughts
In mastering the craft of drawing planes in fire and rescue scenarios, artists not only express creativity but also pay homage to the brave souls engaged in real-life emergency response. Understanding the intricate balance of technical skill and emotional storytelling is crucial for capturing the essence of these scenes. By following the structured guidance, employing suggested artistic techniques, and tapping into available resources, every artist—whether a novice or seasoned—can create compelling representations that serve to educate and inspire. Remember, each stroke not only illustrates a scene but also represents the courage and vitality of those dedicated to saving lives.